
What to Do If You Have a Flat Tire: Correct Response to Reduce Losses
Recognizing the Signs of a Flat Tire
The first step in reducing losses is identifying the problem quickly. A flat tire doesn’t always announce itself with a dramatic blowout. Sometimes, it’s a slow leak that gradually compromises your driving experience. Common signs include:
· Vibration or Pulling: If your steering wheel vibrates excessively or your car pulls to one side, a tire may be losing pressure.
· Warning Light: Most modern vehicles have a Tire Pressure Monitoring System (TPMS) that alerts you to low pressure.
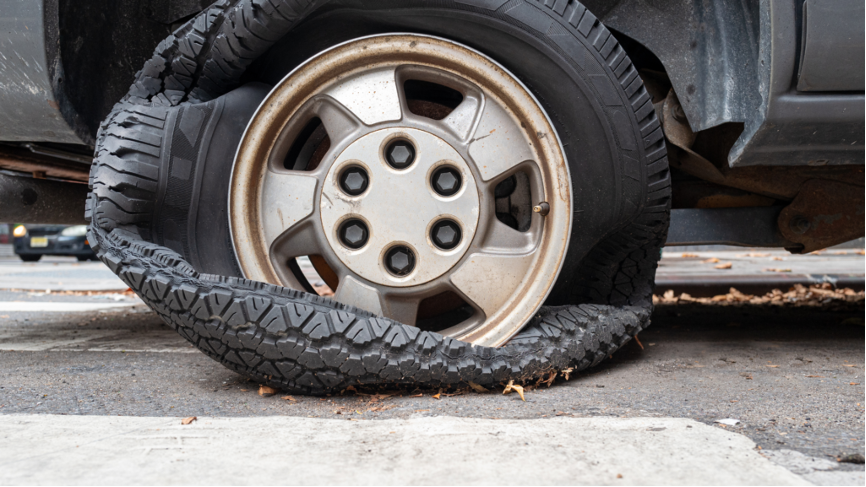
· Visual or Audible Cues: A visibly sagging tire, a hissing sound, or the telltale thump-thump-thump of a flat against the pavement are dead giveaways.
Acting promptly when you notice these signs can prevent further damage. Driving on a flat tire, even for a short distance, risks ruining the tire beyond repair, damaging the rim, or compromising your vehicle’s suspension. The sooner you respond, the better your chances of minimizing losses.
Step 1: Stay Calm and Find a Safe Location
Your immediate priority is safety. A flat tire on a busy road or at high speed can be dangerous, so your first action should be to remain calm and assess your surroundings. Avoid slamming on the brakes or swerving—ease off the accelerator, turn on your hazard lights, and steer toward a safe spot. Ideally, this is a flat, stable area off the road, like a shoulder, parking lot, or side street. If you’re on a highway and can’t reach an exit, pull as far onto the shoulder as possible.
Staying in a safe location reduces the risk of accidents, which could lead to costly repairs or injuries. If you’re stuck in an unsafe spot (e.g., a narrow road with no shoulder), stay in your vehicle with your seatbelt on and call for roadside assistance rather than attempting a risky repair.
Step 2: Assess the Damage
Once you’re safely off the road, inspect the tire to understand the extent of the problem. Is it a slow leak, a puncture from a nail, or a full-blown blowout? This assessment helps determine your next move and potential costs. For example:
· Minor Punctures: A small hole from a nail or screw might be fixable with a tire repair kit or a patch, costing $10-$30.
· Severe Damage: A sidewall tear or rim damage often requires a new tire ($50-$200+) and possibly rim repair or replacement ($100-$500).
Use this moment to check your spare tire, jack, lug wrench, and any repair tools in your trunk. If you don’t have these essentials—or if the spare is flat or missing—you’ll need to call for help, which we’ll cover later.
Step 3: Decide Whether to Fix or Replace
Your response hinges on your tools, skills, and situation. Here are your options:
· Temporary Fix with a Tire Repair Kit: For small punctures, a plug kit (available for $10-$20 at auto stores) can seal the hole without removing the tire. Insert the rubber plug into the puncture using the provided tool, reinflate the tire with a portable pump or compressor, and drive to a mechanic for a permanent patch. This quick fix reduces downtime and gets you back on the road cheaply.
· Swap to a Spare Tire: If the damage is irreparable or you don’t have a repair kit, replacing the flat with a spare is the classic solution. Most cars come with a compact “donut” spare designed for short distances (typically 50-70 miles at reduced speeds). This option avoids immediate towing costs but requires a proper tire replacement soon after.
· Call for Help: If you lack a spare, tools, or confidence, roadside assistance or a tow truck is your best bet. Many insurance policies or auto clubs (like AAA) offer this service for free or a small fee, saving you from botched DIY attempts that could damage your car further.
Choosing the right approach minimizes losses. For instance, forcing a repair kit on a sidewall tear wastes time and money, while driving on a damaged rim to avoid a tow fee could cost hundreds in repairs.
Step 4: Execute the Plan Safely
If you’re changing the tire yourself, follow these steps to avoid injury or additional damage:
1. Secure the Vehicle: Park on a flat surface, engage the parking brake, and place a heavy object (like a rock or wheel chock) behind or in front of the other tires to prevent rolling.
2. Set Up Warnings: Place reflective triangles or flares 10-20 feet behind your car to alert other drivers, especially at night or in low visibility.
3. Loosen Lug Nuts: Use the lug wrench to loosen the nuts on the flat tire, but don’t remove them yet—do this while the car is on the ground for leverage.
4. Lift the Car: Position the jack under the vehicle’s frame near the flat tire (consult your manual for the exact spot) and raise it until the tire is off the ground.
5. Remove and Replace: Unscrew the lug nuts fully, remove the flat tire, mount the spare, and hand-tighten the nuts. Lower the car and tighten the nuts fully in a star pattern with the wrench.
6. Check Pressure: Ensure the spare is properly inflated (most donuts require 60 PSI—check the sidewall).
Safety here prevents losses beyond the tire—think personal injury or a jack collapse damaging your car’s undercarriage.
Step 5: Minimize Future Costs
After resolving the immediate issue, take steps to limit long-term losses:
· Repair or Replace Promptly: Get the flat tire patched ($20-$30) or replaced ($50-$200) at a shop. Donuts aren’t meant for extended use, and delaying a fix risks another breakdown.
· Inspect Other Tires: A flat might signal broader issues—uneven wear, alignment problems, or road hazards affecting multiple tires. A $50 alignment check could save you from replacing all four tires prematurely.
· Restock Your Kit: Replace your spare, repair kit, or tools if used. A $30 investment now beats a $100 tow later.
When to Call a Professional
Sometimes, DIY isn’t the best way to reduce losses. Call a pro if:
· You’re on a busy highway with no safe spot.
· The tire or rim damage is severe (e.g., bent rim, shredded tire).
· You lack the tools or know-how.
· Weather conditions (rain, snow) make a roadside fix hazardous.
Roadside assistance might cost $50-$100 if not covered by insurance, but it’s cheaper than a crash or botched repair.
Prevention: The Ultimate Loss-Reduction Strategy
Finally, proactive habits can prevent flat tires altogether, saving you time and money:
· Check Tire Pressure Monthly: Inflate to the recommended PSI (found on your driver’s door sticker).
· Inspect Tread: Replace tires when tread wears below 2/32 of an inch (use the penny test—Lincoln’s head should be partially covered).
· Avoid Hazards: Steer clear of potholes, debris, and curbs when possible.
· Rotate Tires: Every 5,000-8,000 miles ensures even wear.
A flat tire doesn’t have to spiral into a major loss. By staying calm, acting decisively, and following these steps, you can keep costs low, protect your vehicle, and get back on the road with minimal hassle. Preparation and knowledge are your best tools—keep them as sharp as your lug wrench.